Sunday, April 27, 2008

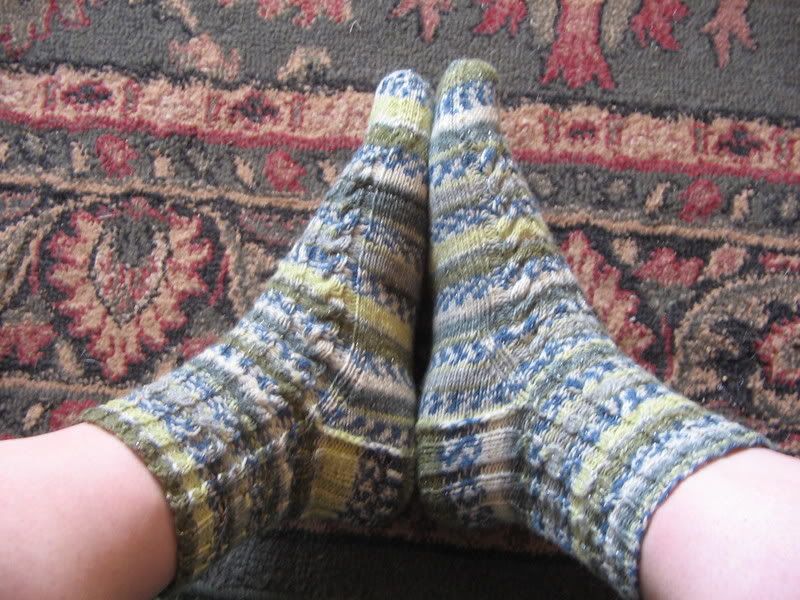
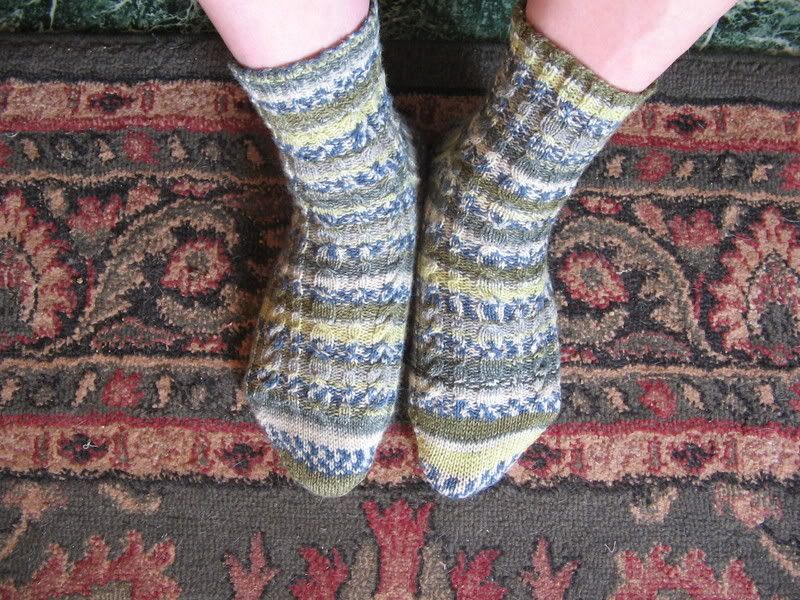
FO: Naive Socks

Photobucket

Well, there's actually a bit of a story to why I chose to knit these socks. A friend has asked me to make her some very tall and cabled socks in the future. I told her I would consider, even though I'd never finished a cabled project before. I did try making the Irish Hiking Scarf a few years ago, but I never finished it. It's actually a very simple pattern that is perfect for beginners, but I may have been looking for a bit more of a challenge at the end of the day. Anyway, it was high time I tried a cabled pattern again and I figured a sock pattern would be a good idea. So I browsed all over Ravelry and found this Naive Socks pattern. It looked like just the thing. It featured several different cables that weren't always crossed on the same row. Additionally, the pattern is carried down the heel somewhat and it really added a fun element to keep me motivated.
Photobucket

Overall, I really like these socks. They fit very well and are quite comfortable. The yarn feels just a little thicker than some of the other fingering weight yarns I've been using recently. I would highly recommend the yarn though because it really sparkles and I like the color changes. I considered matching the stripes on each sock, but I didn't take the time to really do so. But, I actually really like the way they came out. They match without being too matchy matchy. :) I am pleased to say that I learned how to cable without using a needle on this project. It was a little scary at first, but much quicker and easier than I anticipated. I've also discovered that using a size 2 1/2 needle for the toe works wonders for me. I shall have to remember to do it every time. It makes the toe fit so much better for me.

Pattern: Naive Socks (see link posted above)
Yarn: Schoeller + Stahl Fortissima Colori Disco Socka
Needles: Size 2 and 2 1/2 (for toe)
Techniques learned: Cable without a needle

Monday, April 7, 2008

FO - Everlasting Bag II

My friend Tawah bought this fun green cotton yarn a while back, but she was having a heck of a time trying to make it into a bag. She told me that she tried several patterns and none of them were working out correctly. She asked if she could send me the yarn so that I could take a stab at it. Naturally, I thought that sounded like a fine plan. So, she sent me the yarn and I decided that I would make a modified Everlasting Bagstopper. The yarn is DK weight though, so I couldn't use the numbers from the pattern, even if I had wanted to. But, I do love the construction of the bag, so that's what I went with.

I cast on for this bag and went to work. Everything I tried seemed to go wrong. The bag was either too loose, too tight, too big, too ugly, or some combination of these. It was a bit of a nightmare really. The problem? Tawah only had 1 skein of this yarn for me to use. That meant, it had to be just right or I would run out of yarn. I ripped the bag out at least 4 times that I can count because of the yardage issue. I tried at least 3 needle sizes, trying to get a good looking product. Finally, after several months of playing around, I figured it out.

I used size 7s for the bottom and then 10.5s for the body. I did decreases in the stockinette portion of the bag before starting the pattern. After much debate, I went with a simple stitch pattern because it worked. I also worked a few decreases at the top in the seed stitch portion of the bag. I wanted it to be just a little tighter at the top because it is likely to stretch with use. After all was said and done, I really liked the finished object. It's useful and that really is what matters for me. I met Tawah in Indiana just before Easter and gave it to her. She seemed to love it! Hooray! We loaded it up with snacks for her car trip and it worked beautifully. Next time she wants me to make a bag for her though, she's going to have to send me more yarn! That's all there is to it. :)

In case you are curious, that's a laptop inside the bag. I wanted to try and show how big the bag could actually become. :) You can see the fun pooling effect of the yarn in this picture. I'm not sure why, but it is much more apparent in the pictures than in person. Go figure!